XMAMan.GraphicEngine
0.0.1
dotnet add package XMAMan.GraphicEngine --version 0.0.1
NuGet\Install-Package XMAMan.GraphicEngine -Version 0.0.1
<PackageReference Include="XMAMan.GraphicEngine" Version="0.0.1" />
<PackageVersion Include="XMAMan.GraphicEngine" Version="0.0.1" />
<PackageReference Include="XMAMan.GraphicEngine" />
paket add XMAMan.GraphicEngine --version 0.0.1
#r "nuget: XMAMan.GraphicEngine, 0.0.1"
#:package XMAMan.GraphicEngine@0.0.1
#addin nuget:?package=XMAMan.GraphicEngine&version=0.0.1
#tool nuget:?package=XMAMan.GraphicEngine&version=0.0.1
How to use the GraphicEngine
There is support for WinForm and WPF. Outputmethods are 2D, 3D and Raytracing.
Usage of the Raytracer
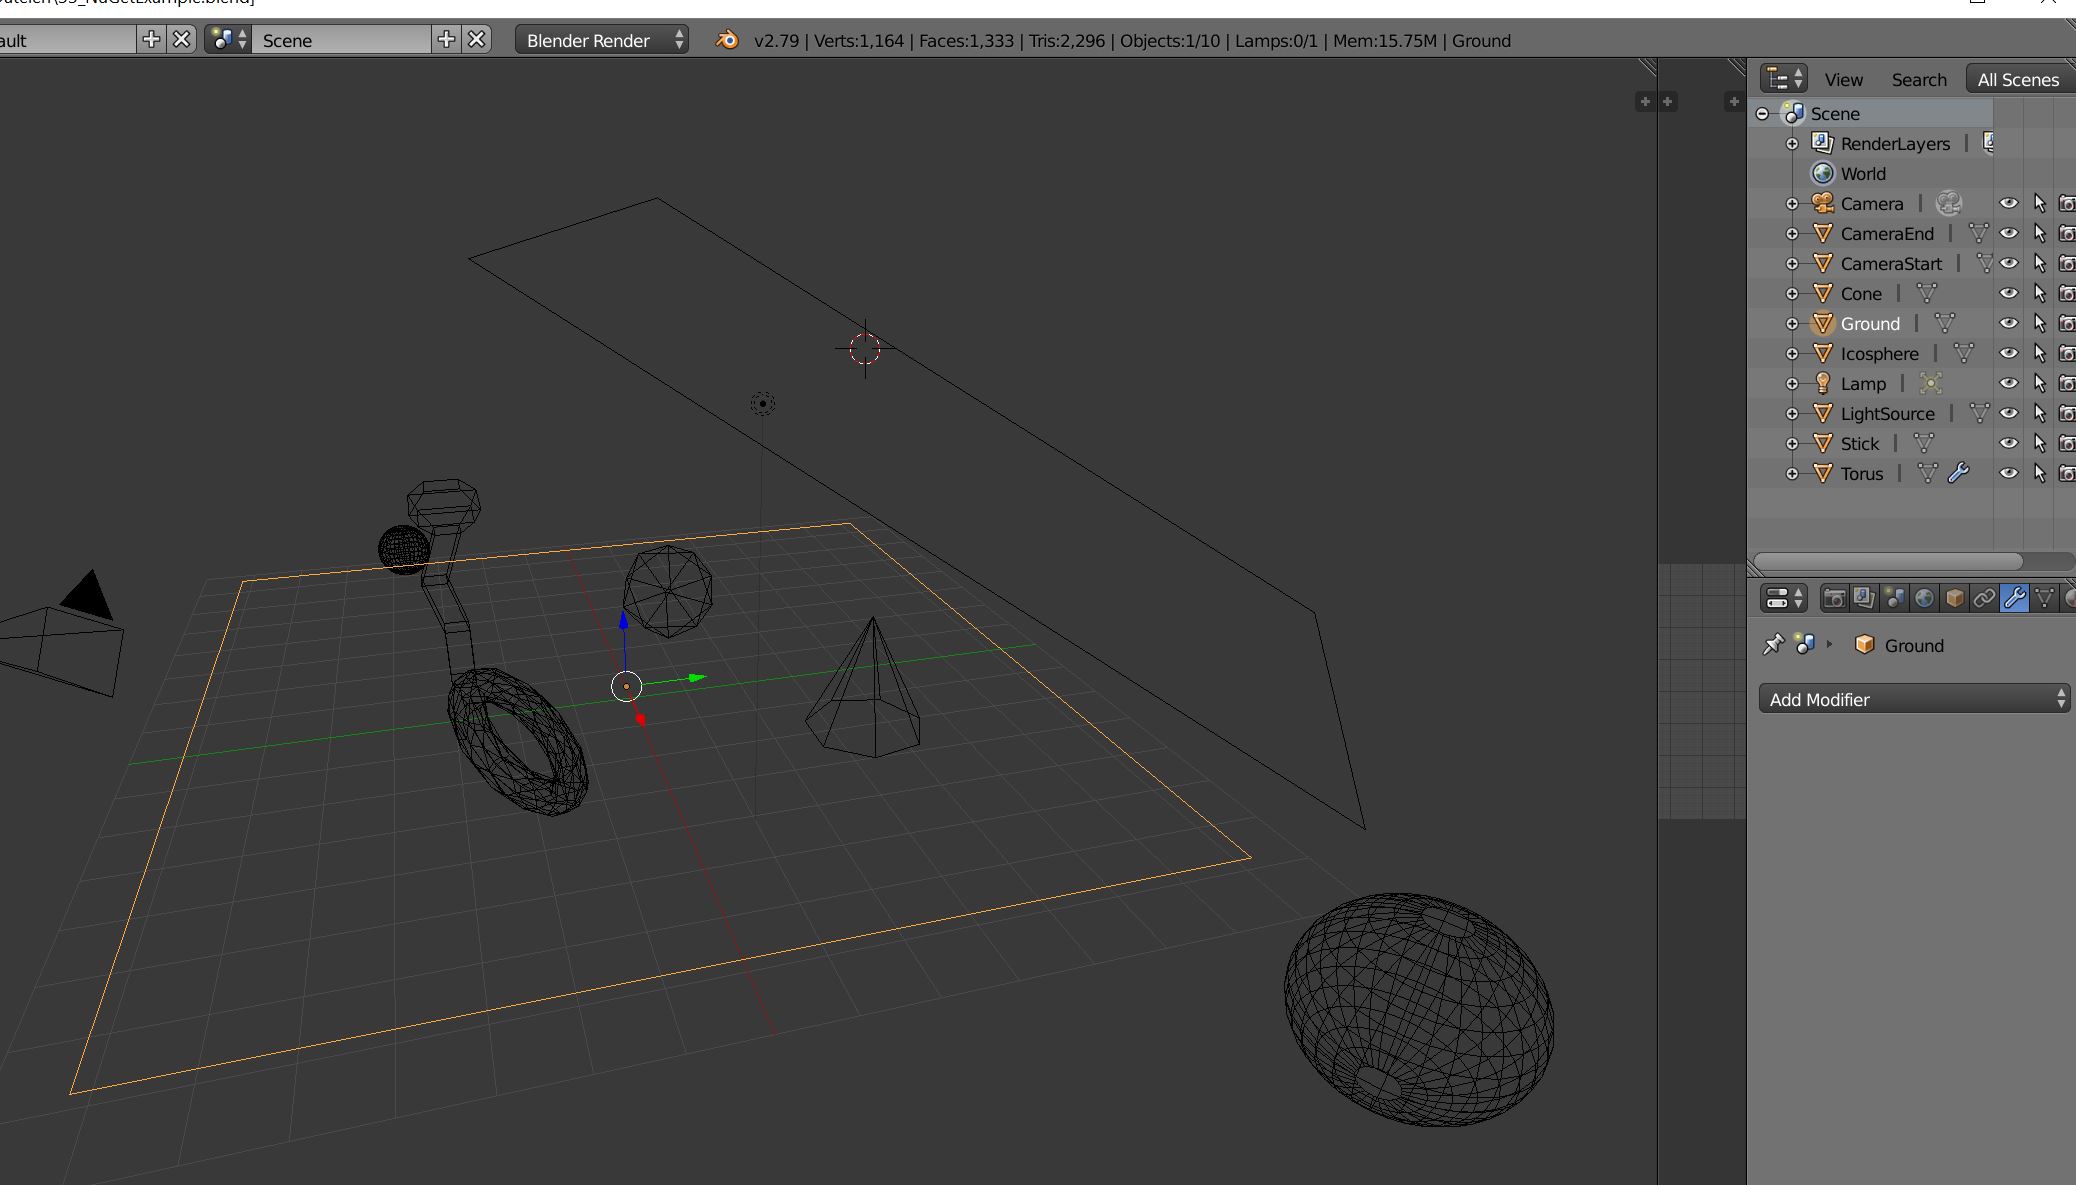
Step 1: Create your scene with blender
Use the Wavefront-Exporter and use the triangulate-checkbox for export.
Step 2: Create a WPF-Project
You need this in your csproj-File:
<UseWindowsForms>true</UseWindowsForms>
Add this to your xaml-File to place the GraphicPanel
<Border BorderThickness="5" BorderBrush="DarkBlue" x:Name="graphicControlBorder"/>
For you code-behind you need this
 var panel = new GraphicPanel3D() { Width = 100, Height = 100, Mode = Mode3D.OpenGL_Version_3_0 };
 this.graphicControlBorder.Child = new GraphicControl(panel);

 this.DataContext = new ViewModel(panel);
Now you can use the GraphicPanel3D-Object in your ViewModel to send the drawing-commands to the view. In our case we want to use the raytracer to show a blender-file. To do this we need to add at first the obj-file:
panel.RemoveAllObjekts();
panel.AddWaveFrontFileAndSplit(DataDirectory + "3DScene.obj", false, new ObjectPropertys()
{
    SpecularHighlightPowExponent = 20,
    NormalInterpolation = InterpolationMode.Flat,
    Albedo = 0.5f
});
After this we can start the raytracer asynchron with
this.panel.StartRaytracing(this.panel.Width, this.panel.Height, (result) => {}, (error) => {});
You can show/update the raytracingresult on the graphicpanel with this line of code:
graphicPanel.UpdateProgressImage();
This will produce this image.
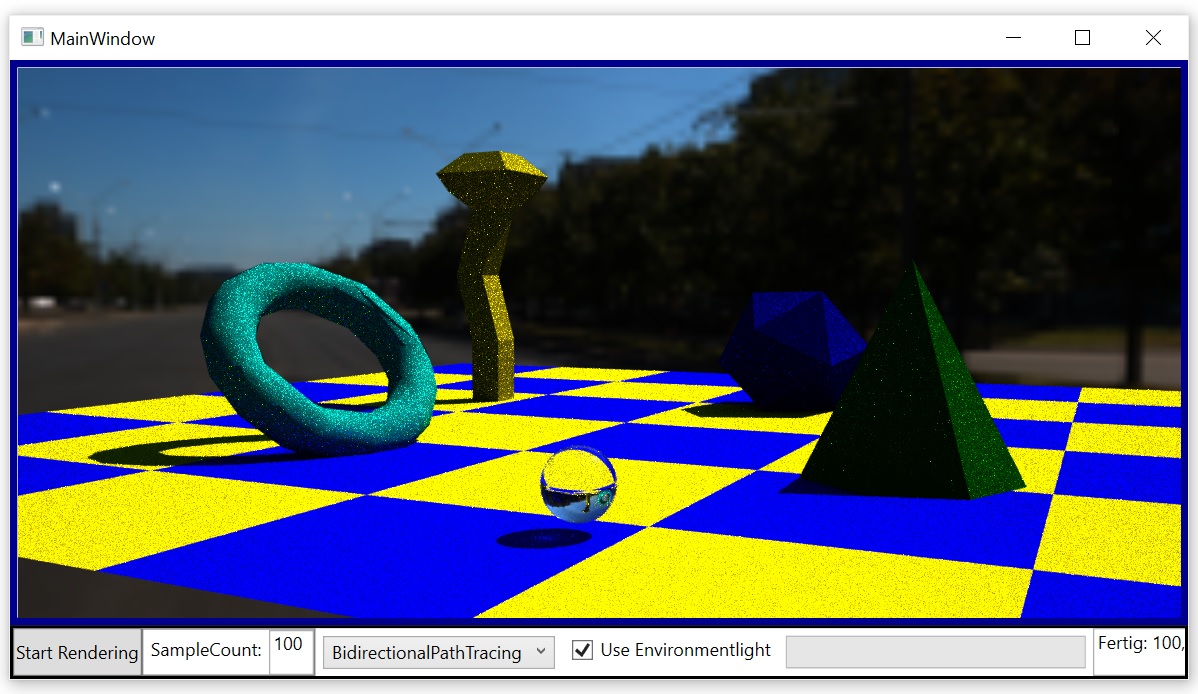
See the Raytracer-Demo-project for details.
3D-Output via WPF
You start again like in the raytracer-project by creating a WPF-Project and add the GraphicPanel to the view and viewModel.
If you want to display a 3D-scene you load the data into the GraphicPanel one times with this method:
private void Add3DObjects()
{
    panel.RemoveAllObjekts();

    //Ground
    int groundId = panel.AddSquareXY(1, 1, 1, new ObjectPropertys()
    {
        Position = new Vector3D(0, 0, 0),
        Orientation = new Vector3D(-90, 0, 180),
        Size = 80,
        Color = new ColorFromTexture()
        {
            TextureFile = DataDirectory + "Decal.bmp",
            TextureMatrix = Matrix3x3.Scale(6, 6)
        },
        ShowFromTwoSides = true,
        BrdfModel = BrdfModel.Diffus,

    });

    //Use Parallax Mapping for the ground
    var tex = this.panel.GetObjectById(groundId).Color.As<ColorFromTexture>();
    this.panel.GetObjectById(groundId).NormalSource = new NormalFromParallax()
    {
        ParallaxMap = tex.TextureFile,
        TextureMatrix = tex.TextureMatrix,
        ConvertNormalMapFromColor = true,
        TexturHeightFactor = 0.04f,
        IsParallaxEdgeCutoffEnabled = true
    };


    //Player
    this.playerId = panel.AddCylinder(2, 1, 1, true, 10, new ObjectPropertys()
    {
        Position = new Vector3D(0, 2, 0),
        Orientation = new Vector3D(0, 0, 0),
        Color = new ColorFromRgb() { Rgb = new Vector3D(1, 0, 0) },
        BrdfModel = BrdfModel.DiffuseAndMirror,
        HasStencilShadow = true,
    });

    panel.AddRing(0.3f, 2, 5, 20, new ObjectPropertys()
    {
        Position = new Vector3D(0, 2, 0),
        Orientation = new Vector3D(0, 0, 45),
        Size = 1,
        HasStencilShadow = true,
        NormalInterpolation = InterpolationMode.Smooth,
        TextureFile = "#004400",
        SpecularHighlightPowExponent = 50,
        ShowFromTwoSides = false
    });

    //LightSource
    panel.AddSphere(0.1f, 10, 10, new ObjectPropertys()
    {
        Position = new Vector3D(0, 10, 3),
        Orientation = new Vector3D(0, 0, 45),
        Size = 1.0f,
        TextureFile = "#FFFFFF",
        ShowFromTwoSides = true,
        RasterizerLightSource = new RasterizerLightSourceDescription() { SpotDirection = Vector3D.Normalize(new Vector3D(0, 30, 0) - new Vector3D(0, 75, 30)), SpotCutoff = 180.0f, SpotExponent = 1, ConstantAttenuation = 1.1f },
        RaytracingLightSource = new DiffuseSphereLightDescription() { Emission = 2200}
    });

    panel.GlobalSettings.BackgroundImage = "#FFFFFF";
    panel.GlobalSettings.ShadowsForRasterizer = RasterizerShadowMode.Shadowmap;
    panel.GlobalSettings.Camera = new Camera(new Vector3D(0, 7, 10), new Vector3D(0, -0.5f, -1), 45.0f);
}
In the timer-tick-method you can now draw the 3D-Object and add also 2D-content at top:
private void Draw()
{
    this.panel.DrawWithoutFlip();
    this.panel.DrawString(10, 10, Color.Red, 15, "Press W,A,S,D for moving the cylinder");
    this.panel.DrawString(10, 30, Color.Red, 15, "Press 1,2,3 or 4 for switching mode. Current mode: " + this.panel.Mode);
    this.panel.FlipBuffer();
}
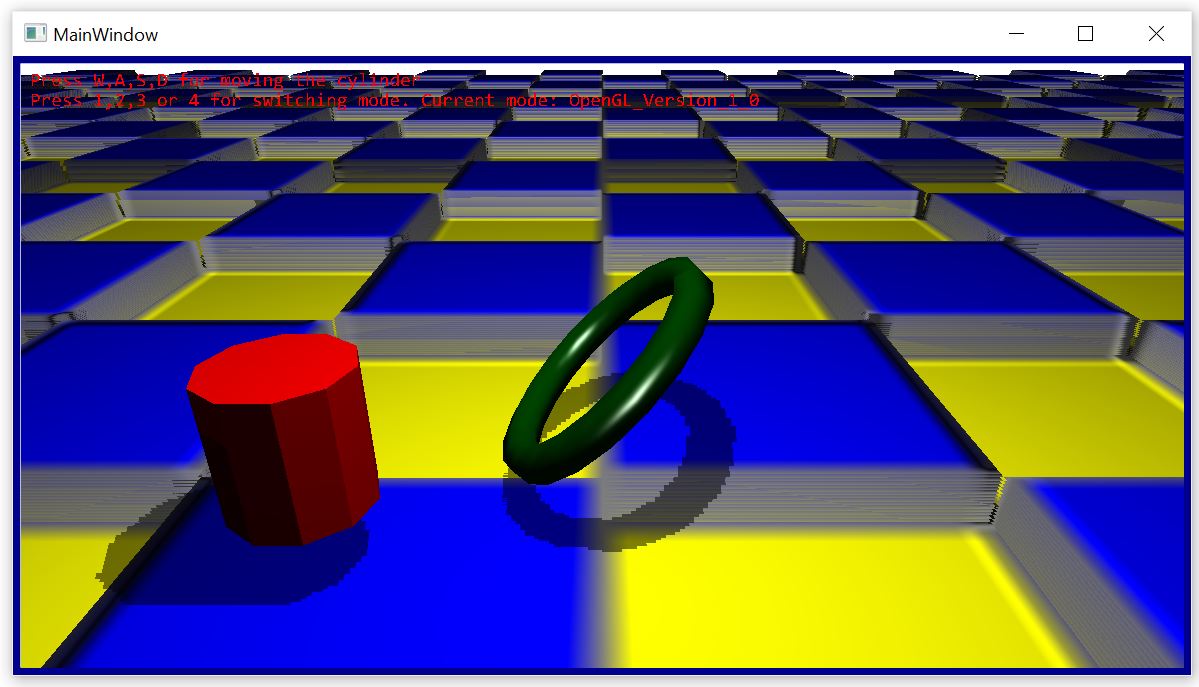
This will produce a 3D-scene where you can move the red cylinder:
See the Wpf3D-Project for details.
3D-Output via WinForm
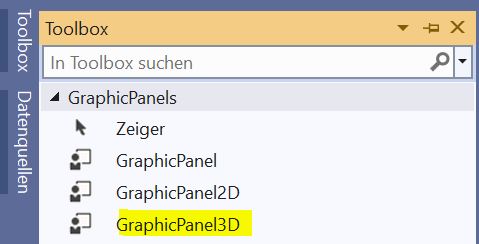
Create a new WinForm-application in VisualStudio and add the GraphicEngine-NuGet. After this go the the toolbox and add the GraphicPanel3D-Panel to your MainWindow-Panel.
You can now again add all 3D-objects one time at start (or durring runtime if you would add/remove an object).
 panel.RemoveAllObjekts();
 //LegoMan from Wavefront file
 this.legoIds = panel.AddWaveFrontFileAndSplit(DataDirectory + "LegoMan.obj", false, new ObjectPropertys()
 {
     NormalInterpolation = InterpolationMode.Smooth,
     SpecularHighlightPowExponent = 50,
     Size = 0.1f,
 });
In the timer-tick-method you call again the DrawWithoutFlip- and FlipBuffer-Method.
private void Draw()
{
    this.panel.DrawWithoutFlip();
    this.panel.DrawString(10, 10, Color.Red, 15, "Press 1,2,3 or 4 for switching mode. Current mode: " + this.panel.Mode);
    this.panel.FlipBuffer();
}
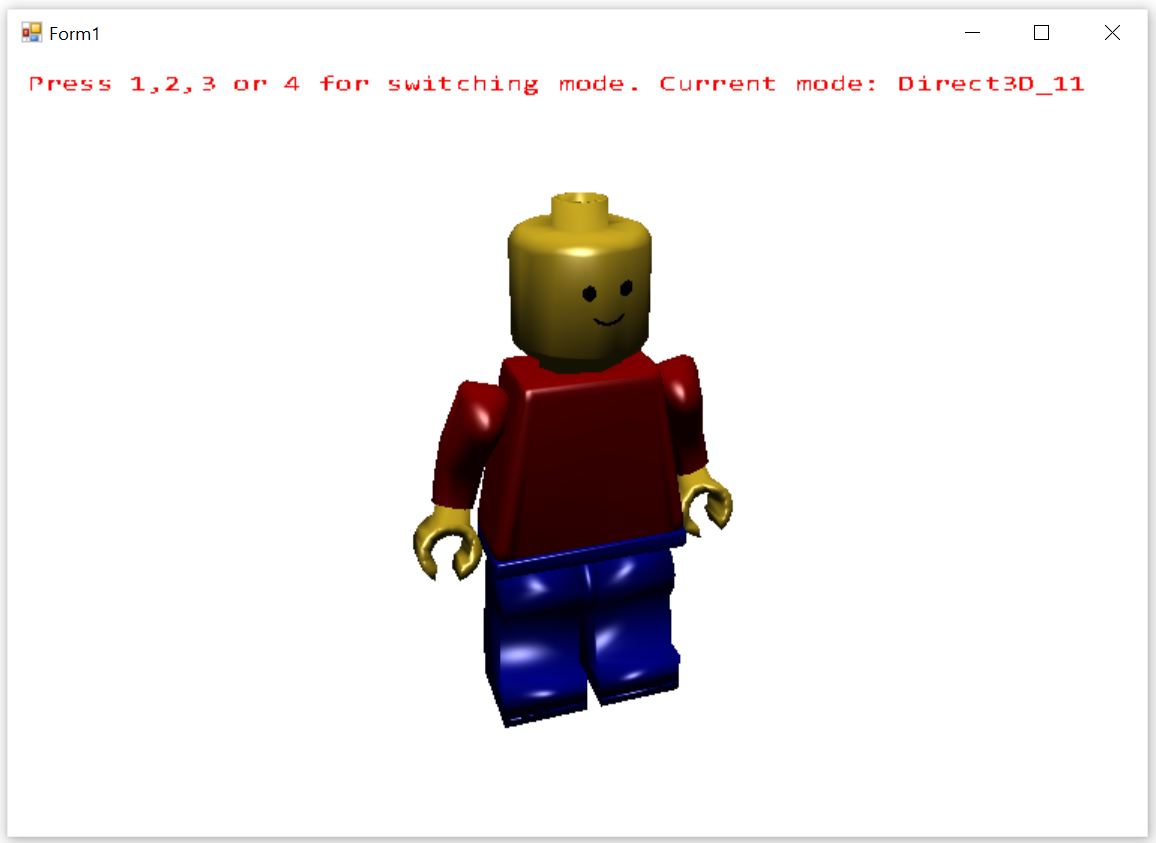
This will produce a legoman which is spinning.
See the WinForm3D-Project for details.
2D-Output via WinForm
You create a new WinForm- or WPF-Project and add the GraphicPanel like in the 3D-Examples. But instead of using the Add-Methods for adding some 3D-Objects you are using the draw-commands direct in the TimerTick-Method.
private void Draw()
{
    this.panel.ClearScreen(Color.AliceBlue);

    this.panel.DrawRectangle(new Pen(Color.Black, 2), 0, 0, this.panel.Width, this.panel.Height);

    this.panel.DrawFillCircle(Color.Green, this.ballPosition, ballRadius);
    this.panel.DrawCircle(Pens.Red, this.mousePosition, 10);

    this.panel.DrawFillRectangle(DataDirectory + "Face_04.png", 10, 10, 300, 200, true, Color.White);

    this.panel.DrawString(10, 10, Color.Black, 15, "Left mouse click for placing red circle");
    this.panel.DrawString(10, 30, Color.Black, 15, "Press 1,2,3 or 4 for switching mode. Current mode: " + this.panel.Mode);


    this.panel.FlipBuffer();
}
This will produce this image with a moving circle:
See the WinForm2D/Wpf2D-Project for details.
| Product | Versions Compatible and additional computed target framework versions. |
|---|---|
| .NET Framework | net is compatible. |
-
.NETFramework 4.6
- Newtonsoft.Json (>= 13.0.1)
-
.NETFramework 4.7
- Newtonsoft.Json (>= 13.0.1)
GitHub repositories
This package is not used by any popular GitHub repositories.
| Version | Downloads | Last Updated |
|---|---|---|
| 0.0.1 | 0 | 3/13/2025 |
First Version
